This tutorial shows how to add authorization to ASP.Net Core Rest API with PlusAuth. If you do not have a PlusAuth account, register from here. We will be using .NET Core Security Framework.
Configure PlusAuth
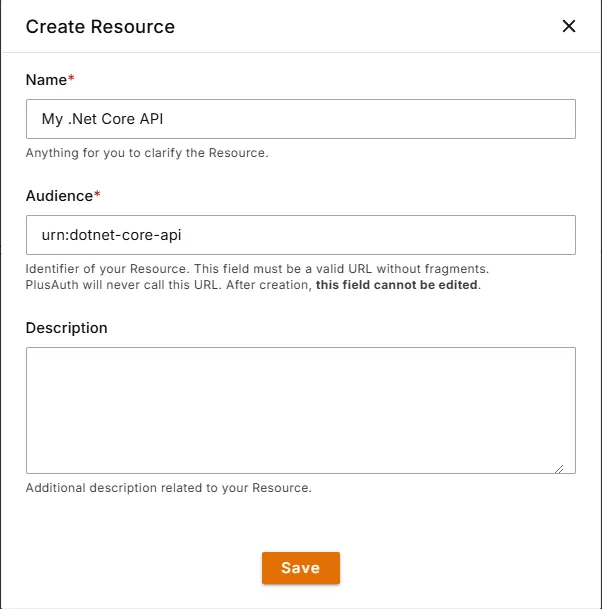
Define your API (Resource)
Go to PlusAuth Dashboard > Resources and create a new resource by clicking the Create button.
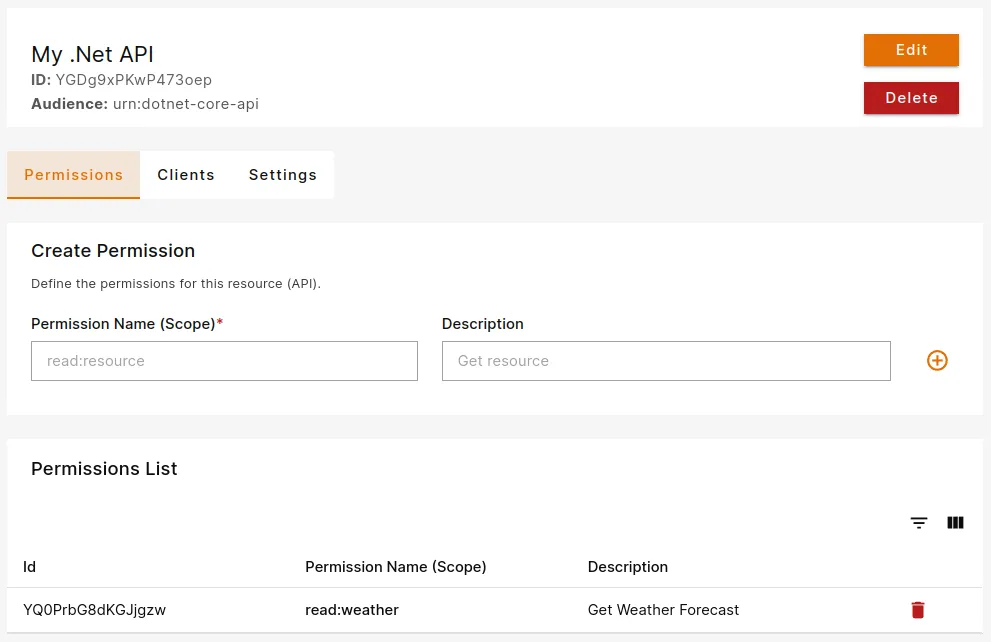
Define Permissions
Permissions play a crucial role in governing access to resources, ensuring that only authorized users or applications interact with sensitive data or functionalities.
You can define allowed permissions in the Permissions view from the Resource details.
For this example we will be using read:weather scope.
Create an API
We will be using the built-in WeatherForecast example project, but if you already have an API, you can use that instead.
Generate the project by using dotnet cli tool and add the necessary dependencies:
dotnet new webapi -o plusauth-dotnet-api-startercd plusauth-dotnet-api-starterdotnet add package Microsoft.AspNetCore.Authentication.JwtBearerMake sure you have installed Microsoft.AspNetCore.Authentication.JwtBearer package compatible to your ASP.NET version. For example, for ASP.NET 7.x, package version should be 7.x.x
Configure Settings
Add following section to your appsettings.json. Audience parameter should be the same with your resource's audience we created in Configure PlusAuth/Define your API step
"PlusAuth": { "Issuer": "https://{YOUR_PLUSAUTH_TENANT_ID}.plusauth.com", "Audience": "urn:dotnet-core-api"}
Configure JWT Authorization
In your Program.cs file register JwtBearer authentication scheme and add the authentication and authorization middleware to the middleware pipeline by using UseAuthentication and UseAuthorization methods:
/* ~~Redacted for simplicity~~ */
builder.Services.AddAuthentication(JwtBearerDefaults.AuthenticationScheme)  .AddJwtBearer(options =>  {    options.Authority = builder.Configuration["PlusAuth:Issuer"];    options.Audience = builder.Configuration["PlusAuth:Audience"];  });
/* ~~Redacted for simplicity~~ */
var app = builder.Build();
app.UseAuthentication();app.UseAuthorization();
/* ~~Redacted for simplicity~~ */
Apply Permission (Scope) Policy
After configuring JWT Authorization we need to check the required scopes for each controller/action. We will be using Policy-Based Authorization provided by ASP.NET Core.
By default, ASP.NET Core does not have a scope authorization requirement, so we should create our own authorization requirement. This requirement will check if scope claim exists, and it contains the required scope provided by policy.
Creating following files:
using Microsoft.AspNetCore.Authorization;
namespace plusauth_dotnet_api_starter;
public class ScopeAuthorizationHandler : AuthorizationHandler<ScopeRequirement>{  protected override Task HandleRequirementAsync(    AuthorizationHandlerContext context,    ScopeRequirement requirement  )  {    var scopeClaim = context.User.FindFirst(c => c.Type == "scope" && c.Issuer == requirement.Issuer);    // If user does not have the scope claim, get out of here    if (scopeClaim == null)      return Task.CompletedTask;
    // Scopes are set of space separated strings. Split them by space...    var scopes = scopeClaim.Value.Split(' ');
    // Check if the list of scopes contains the required scope    if (scopes.Any(s => s == requirement.Scope))      context.Succeed(requirement);
    return Task.CompletedTask;  }}
using Microsoft.AspNetCore.Authorization;
namespace plusauth_dotnet_api_starter;
public class ScopeRequirement : IAuthorizationRequirement{ public string Issuer { get; } public string Scope { get; }
public ScopeRequirement(string scope, string issuer) { Issuer = issuer ?? throw new ArgumentNullException(nameof(issuer)); Scope = scope ?? throw new ArgumentNullException(nameof(scope)); }}After creating authorization requirements as provided above, all we need to do is define our policies. In your Program.cs define your policies with AddAuthorization method. For each scope you have, call the AddPolicy method and use our newly created ScopeRequirement. Finally, register ScopeAuthorizationHandler as a singleton.
In this tutorial we have created read:weather scope (permission), so the code block would look like this.
/* ~~Redacted for simplicity~~ */
builder.Services.AddAuthorization(options =>{  options.AddPolicy("read:weather", policy => policy.Requirements.Add(    new ScopeRequirement(      "read:weather",      builder.Configuration["Authorization:Issuer"]    )    ));});builder.Services.AddSingleton<IAuthorizationHandler, ScopeAuthorizationHandler>();
/* ~~Redacted for simplicity~~ */
Protect Your Endpoints
To secure our endpoints, we need to use [Authorize] attribute with our policy name which is read:weather in this tutorial.
/* ~~Redacted for simplicity~~ */
public class WeatherForecastController : ControllerBase{
  /* ~~Redacted for simplicity~~ */
  [HttpGet(Name = "GetWeatherForecast")]  [Authorize("read:weather")]  public IEnumerable<WeatherForecast> Get()  {     // handle request     /* ~~Redacted for simplicity~~ */  }}
Now, our endpoint expects a JWT access token provided by Authorization header using Bearer scheme and contains read:weather scope.